 Xsolla
Xsolla Payments Integration
Xsolla is a global merchant of record that supports a wide range of payment methods and currencies.
While this article focuses on the payments functionality, Xsolla offers a comprehensive suite of products and services for game developers—including virtual storefronts, distribution, user account systems, in-game store management, analytics, anti-fraud tools, and more. For the full range of Xsolla’s offerings, please consult the Xsolla solutions page.
In this article, we will cover:
- Payment Token Generation: We will generate a payment token for Xsolla Virtual Items and Subscriptions
- Pay Station UI: We will use the generated token to open the Xsolla Pay Station UI
- Xsolla Webhooks: The Colyseus backend will respond to Xsolla webhooks for user validation and payment confirmation
Xsolla Account Setup
Register for Xsolla Publisher Account
By registering from this link, you will be supporting Colyseus
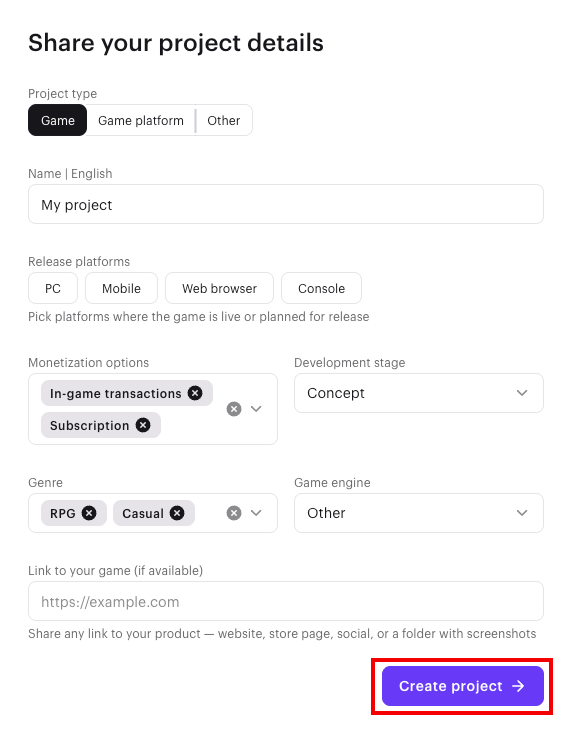
Create Project
Create Virtual Item
Virtual items are one-time purchases. If you plan to sell virtual items, let’s create the first one.
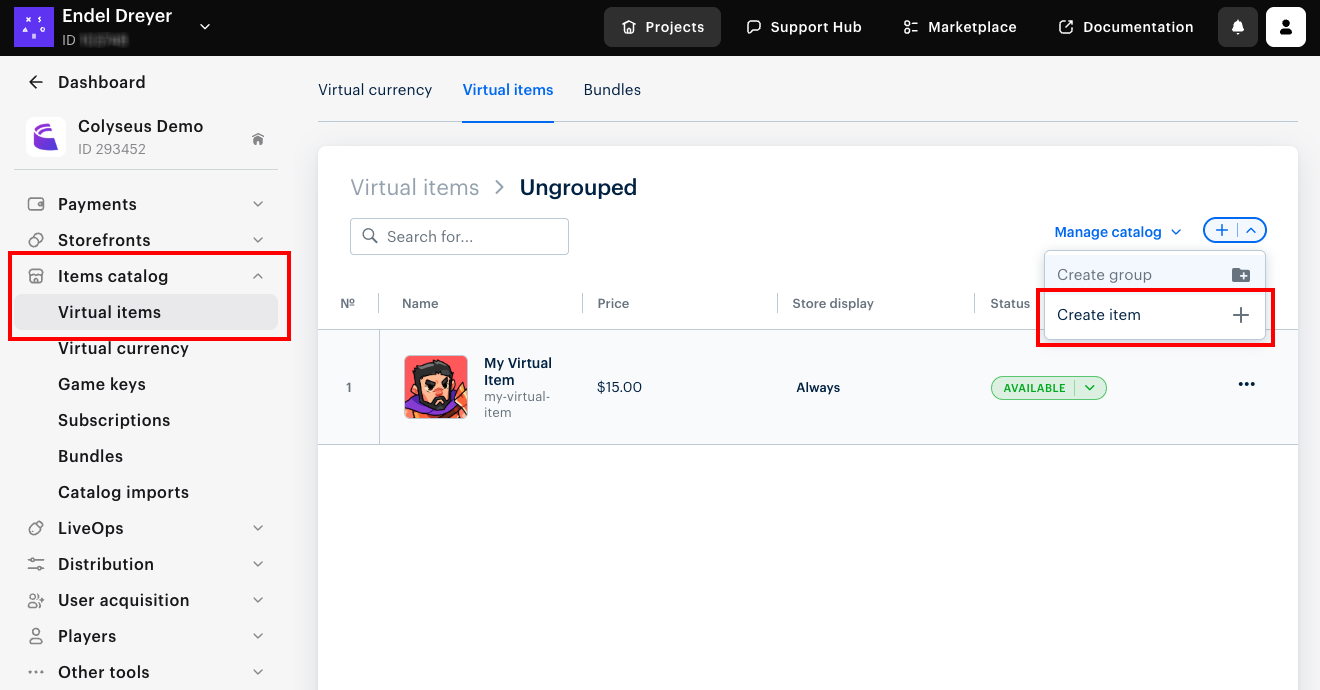
See “Set up virtual item” for more information.
Configure Subscriptions
Xsolla supports 3 types of subscriptions:
- Regular plan: Allows subscribers to make regular payments to access your content.
- Lifetime plan: One-time payment to access your content for life.
- Season pass: One-time payment to access your content for a limited period of time.
See “Set up subscription plan” for more information.
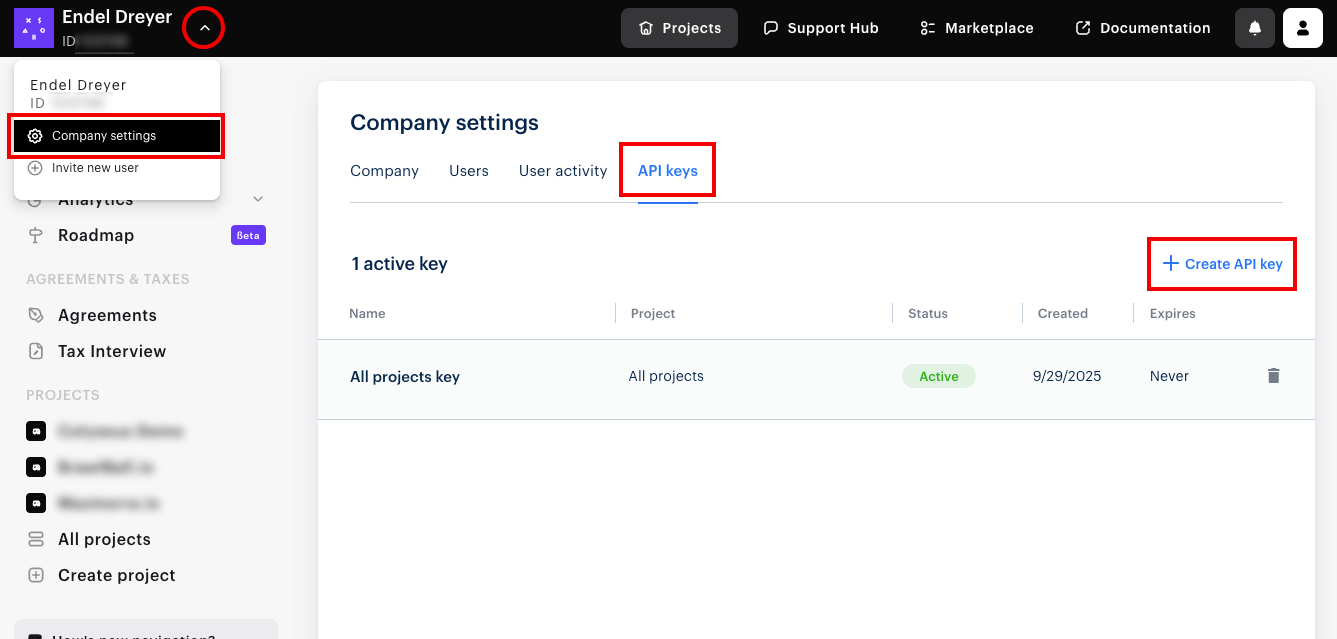
Create “All projects” API Key
To create an “All projects” API Key, go to your company settings, select the “API keys” section, and create a new API key.
Environment Variables
You will need to set the following environment variables in your Colyseus server. Make sure to replace the values with your own.
| Variable | How to get it |
|---|---|
XSOLLA_MERCHANT_ID | Found in your Xsolla dashboard under your Account’s name |
XSOLLA_PROJECT_ID | Found in your Xsolla project dashboard under your project’s name |
XSOLLA_API_KEY | Create an “All projects” API Key in your company settings → “API keys” section |
XSOLLA_WEBHOOK_SECRET_KEY | See Webhooks section for instructions on how to get this value |
NODE_ENV | Set to development for testing, production for live environment |
The Payment Flow
The following diagram shows how the payment flow works.

In the next sections, we will cover each step in detail.
Generate the Payment Token
To initiate a purchase, we first need to generate a Payment Token. This step is required to later open the Xsolla Pay Station UI.
Use the following snippets and modify them to fit your needs.
For simplicity’s sake, this article only presents the code for direct integration with Xsolla.
The snippets from this section should be used as backend HTTP API routes, as shown in src/routes/xsolla.ts file from Colyseus Xsolla Integration repository.
See “Shop Builder API: Create payment token for purchase” for more information.
const userId = "123";
const name = "John Doe";
const email = "john.doe@example.com";
const country = "US";

const items = [
    {
        sku: "my-virtual-item",
        quantity: 1
    }
];

const tokenResponse = await fetch(`https://store.xsolla.com/api/v3/project/${process.env.XSOLLA_PROJECT_ID}/admin/payment/token`, {
    method: 'POST',
    headers: {
        'Accept': 'application/json',
        'Content-Type': 'application/json',
        'Authorization': 'Basic ' + Buffer.from(`${process.env.XSOLLA_MERCHANT_ID}:${process.env.XSOLLA_API_KEY}`).toString('base64')
        // 'X-User-Ip': '127.0.0.1' // Optional: if user's country is unknown, providing the user's IP in 'X-User-Ip' header is an alternative option.
    },
    body: JSON.stringify({
        user: {
            id: { value: userId },
            name: { value: name },
            email: { value: email },

            // user.country.value parameter is used to select a currency for the order.
            // If the user's country is unknown, providing the user's IP in the 'X-User-Ip' header is an alternative option.
            country: { value: country, allow_modify: true }
        },
        purchase: { items },
        sandbox: (process.env.NODE_ENV === "development"), // Use "sandbox" mode in development
        settings: {
            language: "en",
            currency: "USD",
            // payment_method: 1380, // Optional: set preferred payment method
            return_url: "http://localhost:2567/",
            ui: {
                /**
                 * - "63295a9a2e47fab76f7708e1": light theme (default)
                 * - "63295aab2e47fab76f7708e3": the dark theme.
                 * - You can also create a custom theme:
                 *   Go to "Your project > Payments (Pay Station) > UI theme", and copy the ID of your custom theme.
                 */
                theme: "63295aab2e47fab76f7708e3"
            }
        },
        // custom_parameters: {
        // }
    })
});Open Payment UI
After generating the payment token, you can open the Xsolla Pay Station UI from the frontend.
See “Open Payment UI” for more information.
//
// Open the Pay Station UI in an iframe
//
const client = new Client("http://localhost:2567");
const isSandbox = true; // Set to false in production

// Get the token from the backend. This will trigger the /xsolla/token backend route
client.http.post("/xsolla/token").then((response) => {
    // Create iframe
    var iframe = document.createElement("iframe");
    iframe.src = `https://${(isSandbox) ? "sandbox-" : ""}secure.xsolla.com/paystation4/?token=${response.data.token}`;
    iframe.width = "800";
    iframe.height = "930";
    iframe.allow = "clipboard-read; clipboard-write; payment";
    iframe.className = "xsolla-pay-station-iframe";

    // Add event listener to iframe
    document.body.appendChild(iframe);
});Listening to events from the Pay Station UI
The Pay Station UI triggers many events which you can listen to via post-message from the frontend.
/**
* Listen to events from the Pay Station UI
*/
window.addEventListener('message', postMessageListener);
const postMessageListener = (event) => {
if (!event.origin.endsWith(".xsolla.com")) {
/* Skip messages from other origins except Xsolla */
return;
}
const eventData = JSON.parse(event.data);
switch (eventData.command) {
case 'open-status-success':
console.log('Success payment status page opened', eventData.data);
break;
case 'open-status-error':
console.log('Error payment status page opened', eventData.data);
break;
case 'close':
console.log('Payment UI closed', eventData.data);
window.removeEventListener('message', postMessageListener);
break;
default:
console.log('Unhandled event', eventData.command, eventData.data);
break;
}
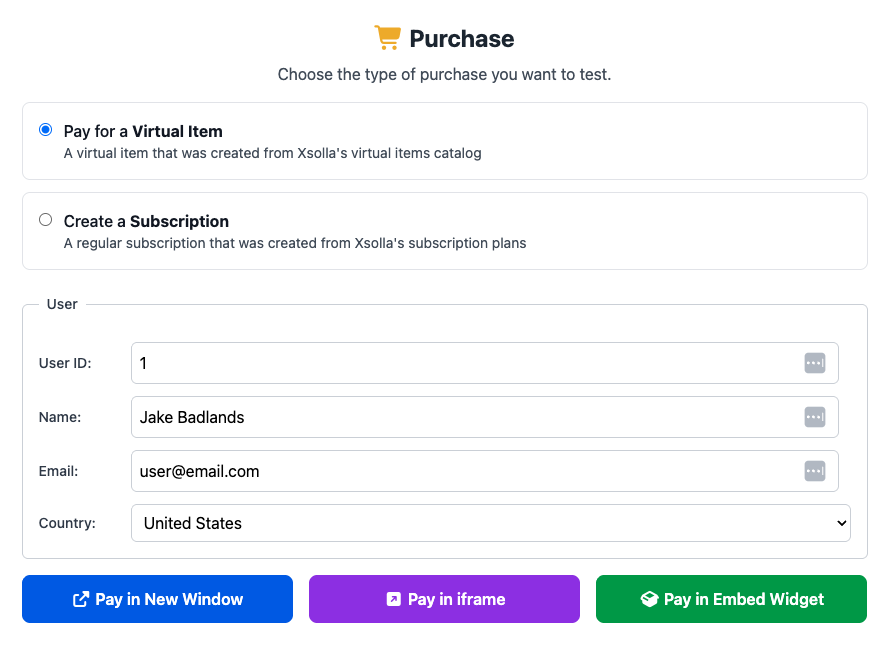
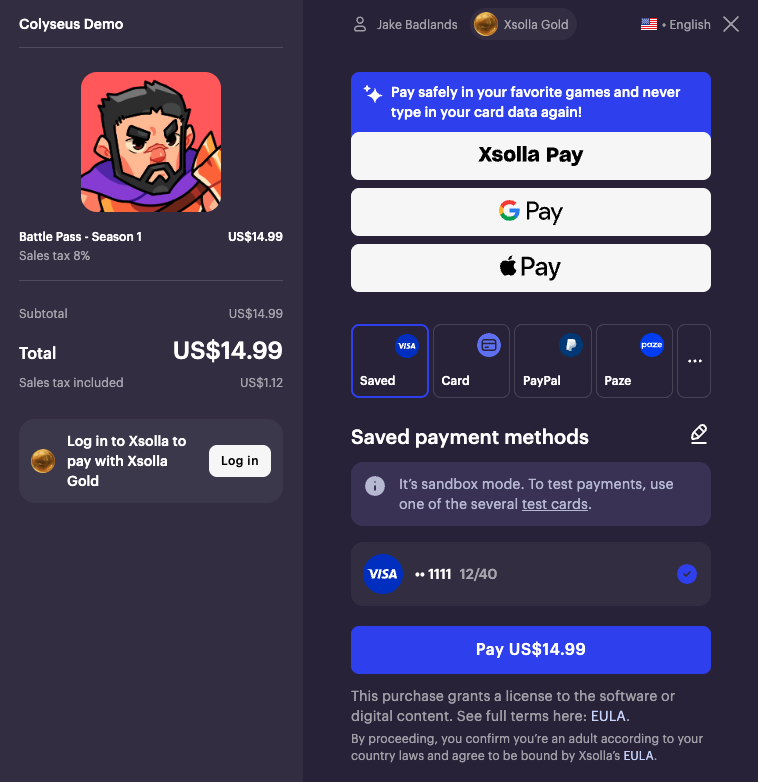
};Example: Purchasing a single virtual item with the Pay Station UI
Webhooks
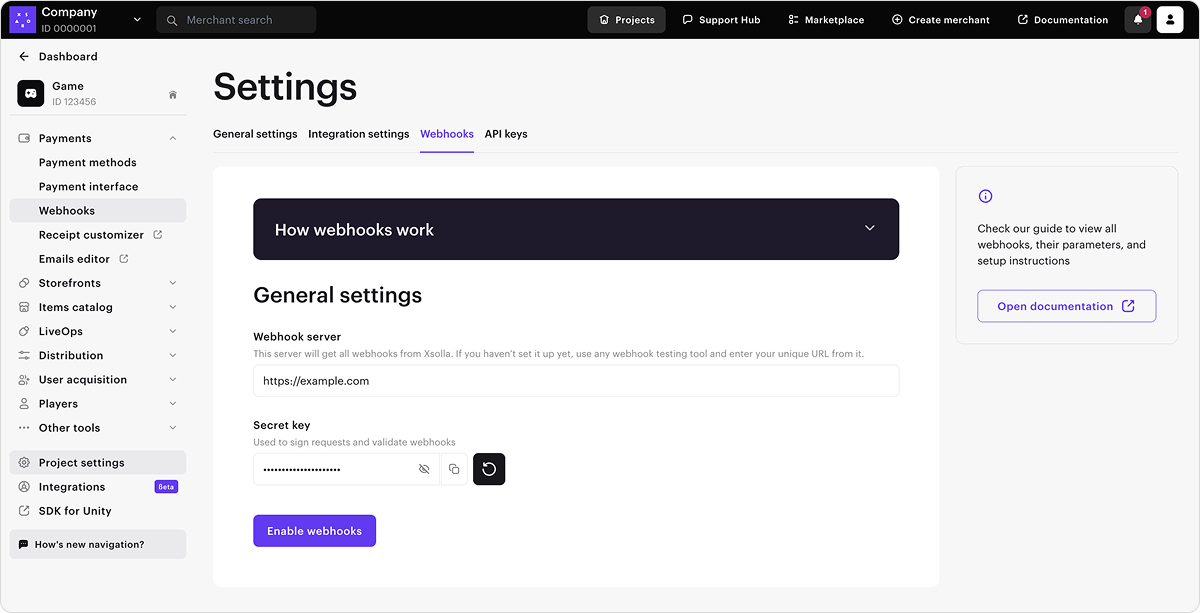
From your Xsolla project, navigate to “Payments → Webhooks”, paste the URL of your publicly accessible Colyseus server and click to “Enable webhooks”.
Testing webhooks from a local server
You can test webhooks from a local server by tunneling it through Cloudflared.
- Install Cloudflared:
npm install -g cloudflared- Start Cloudflared:
npx cloudflared tunnel --url http://localhost:2567- Copy the public URL:
https://[random-string].trycloudflare.com- Paste the public URL in the Xsolla Webhook server field and enable webhooks.
Whenever you change the Webhook server URL, make sure to copy the updated “Secret key” value and paste it in the XSOLLA_WEBHOOK_SECRET_KEY environment variable.
See “Set up webhooks in Publisher Account” for more information.
Required webhooks
For the full operation of the in-game store and payment management, it is necessary to implement the processing of the main webhooks:
Webhook’s notification_type | Action to perform |
|---|---|
user_validation | Validate user data against your database |
order_paid | Grant items/access to user |
order_canceled | Revoke items/access from user |
create_subscription | Grant subscription access |
update_subscription | Update user’s subscription status |
cancel_subscription | Revoke subscription access |
See Xsolla Webhooks for more information.
Implementation example:
Use the following implementation as a reference to handle the webhooks in your Colyseus server.
You will need to bring your own implementation for the handleUserValidation(), handleOrderPaid(), handleOrderCanceled(), handleCreateSubscription(), handleUpdateSubscription(), handleCancelSubscription(), and handleRefund() methods.
import express, { type Request, type Response } from "express";
import crypto from "crypto";

app.post('/webhook', (req: Request, res: Response) => {
    // Read raw body for signature verification
    let rawBody = '';
    req.on('data', chunk => rawBody += chunk);
    req.on('end', () => {
        try {
            // Verify the webhook signature
            if (!verifySignature(req, rawBody)) {
                console.error('Invalid webhook signature');
                res.status(401).json({ error: { code: "INVALID_SIGNATURE" } });
                return;
            }

            // Process the webhook
            processWebhook(JSON.parse(rawBody), res);
        } catch (err: any) {
            console.error('Error processing Xsolla webhook:', err);
            res.status(500).json({ error: { code: "INTERNAL_SERVER_ERROR", message: err.message } });
        }
    });
});

/**
 * Verify the webhook signature
 */
function verifySignature(req: Request, rawBody: string): boolean {
    const signature = req.headers.authorization;
    if (!signature) { return false; }

    // Create expected signature
    const expectedSignature = "Signature " + crypto
        .createHash("sha1")
        .update(rawBody + process.env.XSOLLA_WEBHOOK_SECRET_KEY)
        .digest("hex");

    return signature === expectedSignature;
}

/**
 * Process the webhook based on notification type
 */
function processWebhook(data: any, res: Response): void {
    console.log('Received Xsolla webhook:', data.notification_type);

    switch (data.notification_type) {
        case "user_validation": {
            // TODO: Implement user validation logic
            const isValid = handleUserValidation(data);
            console.log("User Validation:", { isValid });
            if (!isValid) {
                res.status(400).json({ error: { code: "INVALID_USER" } });
                return;
            }
            break;
        }
        case "order_paid": {
            // TODO: Implement order paid logic
            handleOrderPaid(data);
            break;
        }
        case "order_canceled": {
            // TODO: Implement order canceled logic
            handleOrderCanceled(data);
            break;
        }
        case "create_subscription": {
            // TODO: Implement create subscription logic
            handleCreateSubscription(data);
            break;
        }
        case "update_subscription": {
            // TODO: Implement update subscription logic
            handleUpdateSubscription(data);
            break;
        }
        case "cancel_subscription": {
            // TODO: Implement cancel subscription logic
            handleCancelSubscription(data);
            break;
        }
        case "refund": {
            // TODO: Implement refund logic
            handleRefund(data);
            break;
        }
        default: {
            console.log(`Unhandled notification type: ${data.notification_type}`, data);
            break;
        }
    }

    // Always respond with 204 No Content for successful webhook processing
    res.status(204).send();
}
Recommendations
- Use the Authentication → HTTP Middleware to authenticate the user’s request before generating the payment token.
- Use one of the Database recommended solutions for storing, retrieving and validating the user’s data.
- Disallow receiving webhooks from IPs that are not Xsolla IPs. (See Xsolla IP ranges)