 Cocos Creator
Cocos Creator 3
Cocos Creator is a Cross-Platform 2D/3D Game Creation Tool.
The Colyseus SDK for Cocos Creator works in the same way as the JavaScript / TypeScript SDK. The major difference is how to import it from a TypeScript Component asset from Cocos Creator.
Example project: Check out the Tic Tac Toe Example.
Installation
Install the Extension
- Open the Cocos Store (Menu: “Extension” » “Store”)
- Search for “Colyseus SDK”
- Download the extension
- Decompress the zip file to
<path_to_your_project>/extensions/
- Start up Cocos Creator, open extention manager (Menu: “Extension” » “Extension Manager”)
- Click “search for plugins” button on the “Project” tab
- Enable the “colyseus-sdk” plugin

Update your tsconfig.json file
Make sure you have "esModuleInterop": true under "compilerOptions":
  // ...

  /* Add your custom configuration here. */
  "compilerOptions": {
    // ...
    "esModuleInterop": true
    // ...
  }
  // ...
Reboot your Cocos Creator editor.
Importing from the extension
You must import Colyseus from its extension path:
import Colyseus from 'db://colyseus-sdk/colyseus.js';Below is a more elaborate example you can copy and paste into your project.
Save the contents below as NetworkManager.ts under your assets folder.
import { _decorator, Component, Node } from 'cc';
const { ccclass, property } = _decorator;
import Colyseus from 'db://colyseus-sdk/colyseus.js';
@ccclass('NetworkManager')
export class NetworkManager extends Component {
@property hostname = "localhost";
@property port = 2567;
@property useSSL = false;
client!: Colyseus.Client;
room!: Colyseus.Room;
start () {
// Instantiate Colyseus Client
// connects into (ws|wss)://hostname[:port]
this.client = new Colyseus.Client(`${this.useSSL ? "wss" : "ws"}://${this.hostname}${([443, 80].includes(this.port) || this.useSSL) ? "" : `:${this.port}`}`);
// Connect into the room
this.connect();
}
async connect() {
try {
this.room = await this.client.joinOrCreate("my_room");
console.log("joined successfully!");
console.log("user's sessionId:", this.room.sessionId);
this.room.onStateChange((state) => {
console.log("onStateChange: ", state);
});
this.room.onLeave((code) => {
console.log("onLeave:", code);
});
} catch (e) {
console.error(e);
}
}
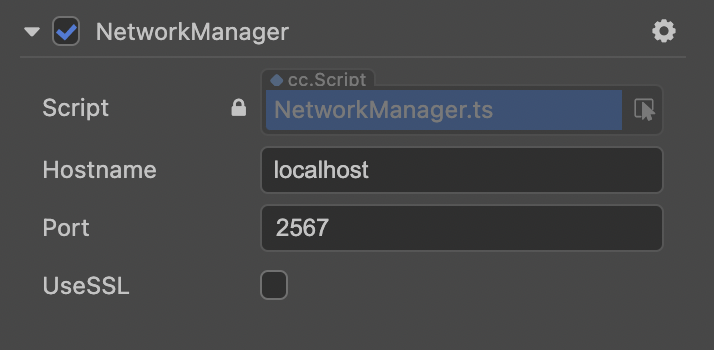
}You can now attach NetworkManager as a Component on any Node from Cocos Creator.
Because we’re using the @property decorator above, you can edit the hostname, port and useSSL from Cocos Creator editor:
Alternative: How to manually add the colyseus.js file into your project (without the extension)
- Download the latest
colyseus-sdk.ziprelease from GitHub. - Unzip the
colyseus-sdk.zipfile into theassets/folder. - Move both
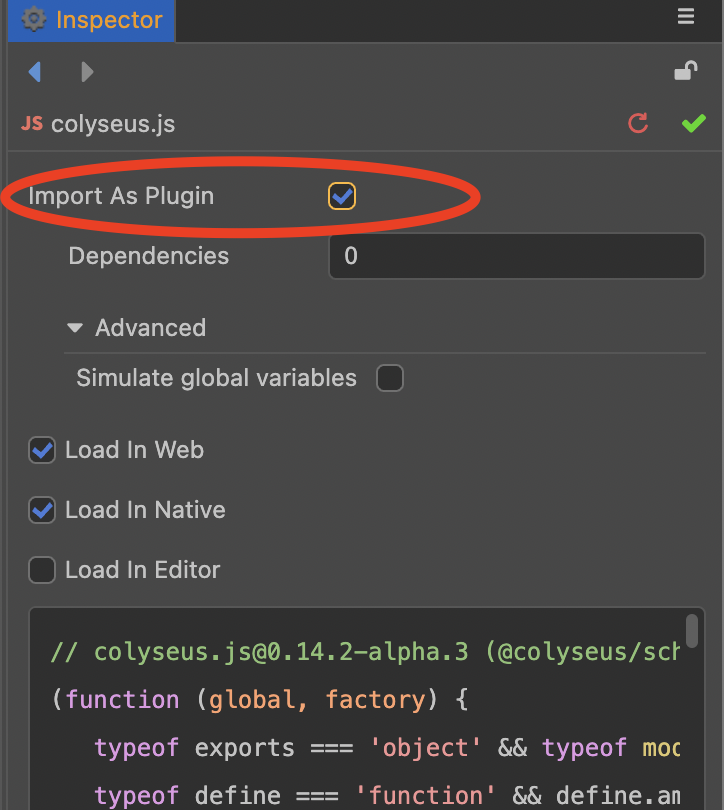
colyseus-cocos-creator.jsandcolyseus.d.tsfiles into your Cocos Creator project’sscriptsfolder. - Click on the
colyseus-cocos-creator.jsfile from the Assets panel, and enable to “Import As Plugin” (see image below) - TypeScript: require it using
import Colyseus from "./colyseus-cocos-creator.js"; - JavaScript: require it using
const Colyseus = require("./colyseus-cocos-creator.js");
Next Steps
- Client SDK API Reference - Full API documentation for all methods, events, and room operations
- State Synchronization - Understanding Schema definitions
- Room API - Server-side room implementation
 GameMaker
 Haxe
Haxe